How To Throw A Bowling Ball? How many times have you embarrassed yourself in the dark, cool lanes of the bowling alley? Wondering how to bowl well. There are always others who have done worse than you, no matter how many times your ball is off-course.
Although it may seem intimidating, throwing a bowling ball is actually quite simple. It’s not about your strength; it’s all about how to throw a bowling ball. Here are some tips to help you get the full score you desire and make everyone jealous next time you throw bowling balls.

Want to skip ahead to a particular section?
7 Steps Of Throwing A Bowling Ball
1. Imagine the line that you will take along the lane
This can vary depending on which lanes you use, but let’s concentrate on a common house condition: Most of the oil is inside the house, leaving approximately 8-10 boards of relatively dry land to be used. These boards can be your friend or foe. You will need to align your feet slightly to your left side depending on how your bowling ball reacts to different conditions. You can adjust your setup as needed once you are more familiar with the hook shot.
- To test the hooking of the lanes, it is best to start with your right foot at the middle dot. To maintain alignment, it is important to keep your feet close together.
2. Stand with your heels about a foot from the foul line.
To determine your starting point, count the number of steps you took away from the lane. You can use a 4-step approach, but you should take 4 steps. The next step is to aim your ball to hit one of the arrows in the lane. It is easiest to aim by using the arrow markings, or the dots just before the lanes.
- This tutorial will show you how to aim at the second arrow to the right. Once the bowling ball has rolled over it, move out to a few boards in the gutter and hook from the dry spot (38-40 feet on a house shot), all the way back towards the 1-3 pocket.
- This would be the 2nd left-hander arrow. The bowling ball would then hook to the 1-2 pockets.
3. Make the swing
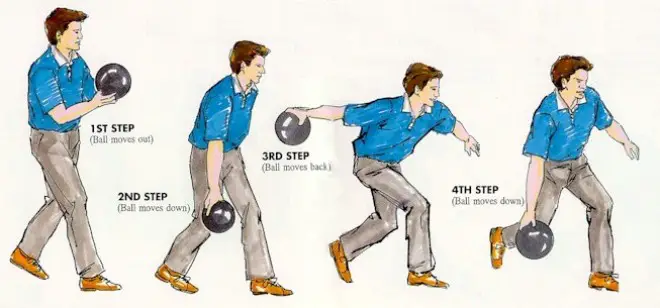
It is best to use a 4-step approach. However, you can use as few as one step and as many of eight (though most steps greater than 4 are just timing steps that your bowling ball doesn’t move). A 4-step approach is recommended:
- For right-handed players, push the ball off your first step and step with your right foot.
- At the second step, place the ball parallel to your ankle and bend your knees.
- Your third step will be the most important.
- Release the bowling ball by the end of the slide.
- It’s five steps long, but you’ll be starting with your left foot. The ball will not move until the first step.
4. Your arm should be straight all the way through your swing
Your arm should not be pushed too close to your body or positioned too far from your body. This will result in a poor angle when you release your ball. If you adjust your push away, it’s easier to keep your arm straight.
- There are many ways to bend your waists, such as Wes Malott or Walter Ray Williams Jr., or to open your shoulders like Tommy Jones or Chris Barnes. However, it is best to stick to the basics when learning how to do the backswing.
- The ball should hook shot once it reaches the back of the lane. However, until that point, the ball should travel a straight line. Everyone is different, so you can adapt your style as you like.
5. Time you release the ball
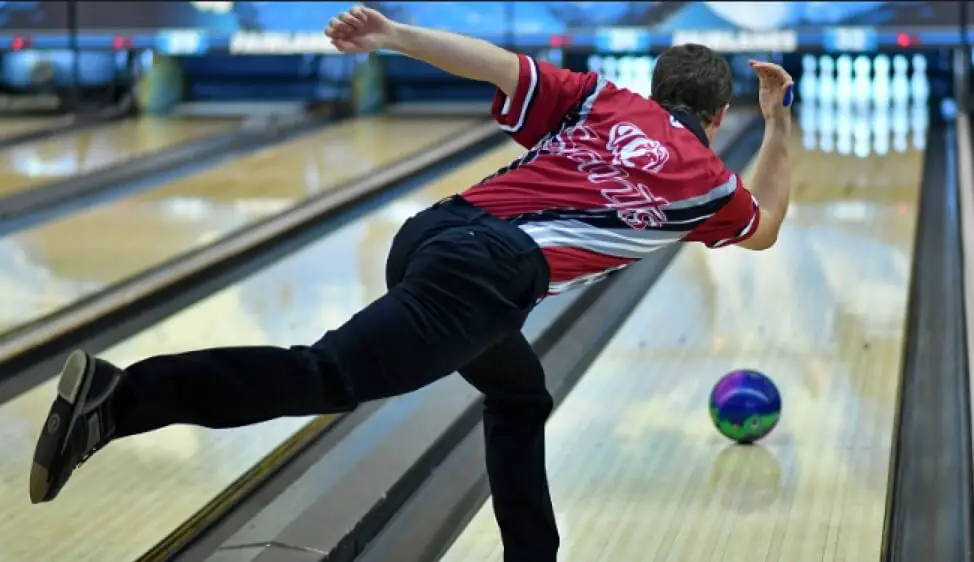
When you are starting to drop the bowling ball from the backswing, ensure that your palm is facing upwards. As the ball approaches your ankle, rotate it so that your palm is directly underneath the side of the ball and possibly slightly less It’s as if you were using a football to throw an underhand spinner. Follow up as if you were going to be chatting with the pins.
- This technique can be practiced by throwing an underhand spiral with your football. The physics involved are similar. You can also use a tennis ball to practice. It will bounce to the side if you do it correctly.
6. Follow these steps
Following through with your arm when you release the bowling ball is just as important. It is important that you follow the ball outwards onto the lane after it has been released. You can lift the ball up with your middle and ring fingers, but not by lifting it upward.
- This is a simple way to remember it: “Roll the ball, then answer your phone.” Hopefully you are better than that guy in the commercial. Fluidity is key here: Don’t do the handshake, then pause for a second, and then follow through. It must be one continuous motion. For consistent ball speed and accuracy, a good follow-through is essential.
7. Make the necessary adjustments
Once you feel comfortable with your release, and you have mastered it on a regular basis, you will be able to adjust your footwork to match your release. You want to follow the house pattern.
- If your right-hander hits high (towards the left of the headpin), you can move your feet a few boards to the left, while keeping your target in the lane.
- To avoid hitting the pocket light (to your right of the 3 pin), move your feet a few boards to the right. This will allow you to keep your target the exact same. When you move your feet, it is important that your target remains in the same lane as your feet. You could end up with very strange angles.
- As you get more skilled and play on more difficult sport lane conditions, your left and right moves become more complex and speed and hand adjustments may be required.
Choose The Right Bowling Balls
The Weight
It is crucial to choose the right weight when learning how to bowl. You don’t have to be overwhelmed by all the different sizes and colors of the bowling balls on the rack. The ideal bowling ball should weigh ten percent of your body.
Ten pounds for someone who is 100 pounds, twenty pounds for someone who is two hundred and fifty pounds, and so forth. It’s fine to choose a lighter ball if you have a broken limb or heart condition.
The Grip
It is crucial to ensure your fingers fit comfortably into the three holes on the ball when you learn how to throw a bowling ball. Your hand should be extended just enough to allow a pencil to pass between your palms and the ball’s surface. If you put too much strain on the ball, it will become off-course.
Preparing the Shot
This section consists of three parts:
1. Your Position
It is important to take note of each step when learning how to throw a bowling ball. How do you approach the lane from this point? What are your steps? What is the point of stopping? Now it’s time for you to calculate all of your x,y, and z coordinates. Match your initial position with every throw a bowling ball that follows. This is a game in which you must match each throw. This will increase your precision and help you score more strikes.
2. Your Speed
Speed is another question that people often ask when learning to bowl. An expert player should aim for 16 mph as their ideal speed. This gives enough power to move the ball straight ahead and take down the entire frame. You might need to adjust, especially if this is your first time playing the game.
3. Your Timing
You should match the timings of each throw, as well as your hand, wrist, and leg coordination. Your timing is just as important as your position and angling.
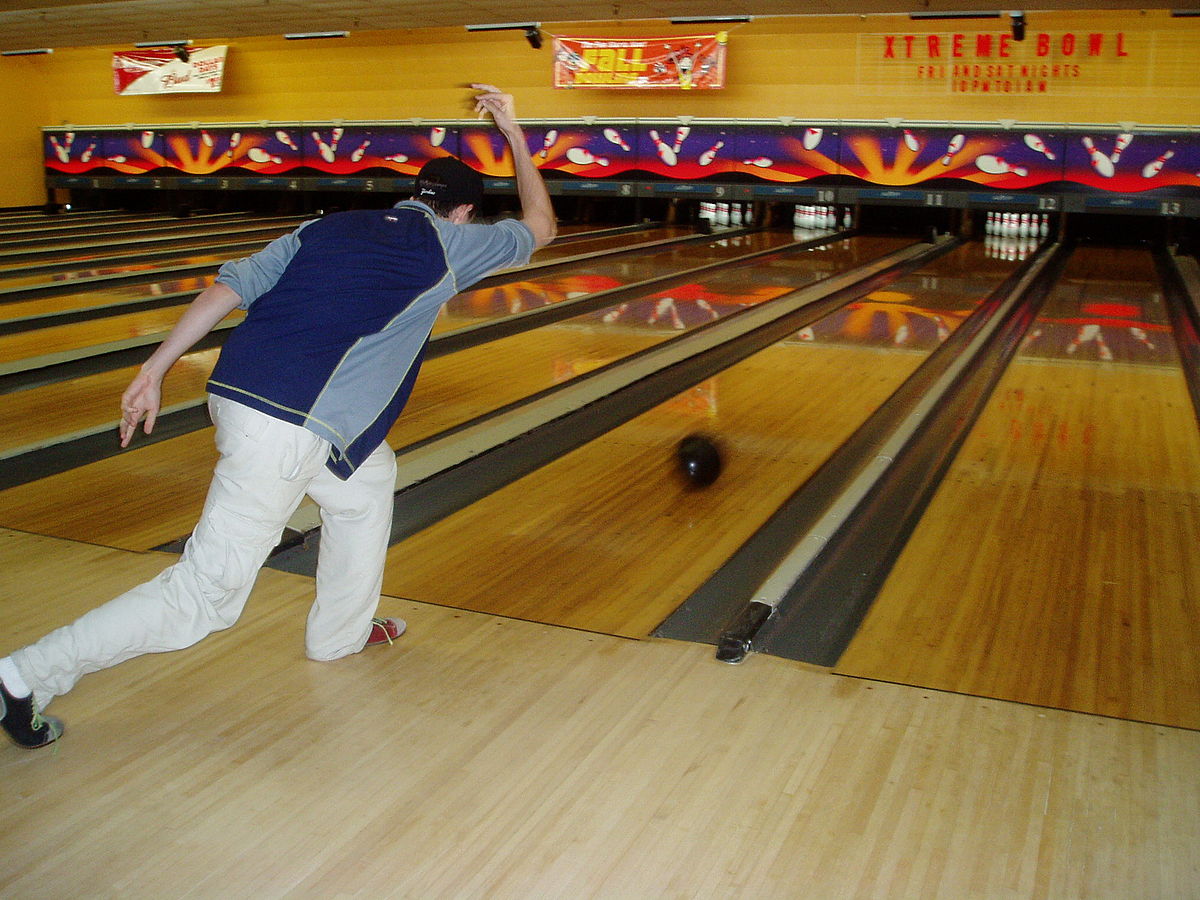
How to throw a bowling ball
To throw the perfect goal, there are only five steps:
First: Straighten your wrist and hand.
Second: While you bowl, keep your arm straight out.
Third: Keep your arm straight and swing your arm towards your ankle.
Fourth: As you hold the ball close to your ankle, rotate your wrist, arm, and hand.
Fifth: You can release the ball from your hands without putting any additional force on it.

